Access
Getting an account
Getting an account and using NU HPC facilities is free of charge for all NU faculty, research assistants, and students. However, opening an account for a research assistant or student requires sponsorship/authorization by their PI (Principal Investigator of a research project; typically a faculty member or head of a lab). Therefore, no accounts will be created at the direct request of a student or RA. The procedure must be initiated by the PI. It is assumed that the PIs take full responsibility for the proper use of the HPC facilities by their group members and their compliance with basic cybersecurity rules.
Below are step-by-step instructions for PIs to request new accounts for themselves and their group members. Please be aware that all NU HPC users must have a valid nu.edu.kz corporate email address.
- To create a new group on an NU HPC cluster (to which group member accounts may be added later), the PI should fill out the corresponding form in the NU IT Helpdesk ticketing system. Detailed instructions for creating such a request in the ticketing system can be found here. If, at the time of filling out the above form, the PI already knows who of his research group members need accounts on Shabyt, he/she can indicate the names, emails, and positions of these people right in that form. Please note that the form must be filled by the PI only, regardless of the fact who the accounts are for and how many of them need to be created. Group members cannot request accounts by themselves and should not fill any forms.
- NU HPC team will process the application form and approve/reject it based on the information provided.
- When the application is approved, a username, temporary password, and first time login instructions will be communicated by the HPC administrator to each new user individually.
- In the case if there is a need to add or remove a group member account under a specific PI any time after the initial group creation (i.e. after the above form is first filled), the PI may request it via the NU Helpdesk ticketing system (chose HPC User Management in the drop-down menu) or by contacting the HPC admin via email hpcadmin@nu.edu.kz. If new accounts are requested, the PI must provide all the necessary information about the new group members (i.e. full name, email, position, phone/messenger number).
Please note a few very important aspects:
- The PI assumes full responsibility for the proper use of the HPC systems by the group members. If the PI cannot or does not want to take this responsibility for the group members then he/she should not request accounts for them.
- The use of NU HPC resources must comply with the Acceptable Use Policy. Any use for non-research related purposes, irresponsible actions that may lead to the damage or malfunctioning of the system, and abuse of NU cybersecurity policies may lead to account suspension and further administrative procedures.
- Note that as per the Acceptable Use Policy account sharing is forbidden. The PI should always request a separate account for each group member. It is easy and takes very little time. To exchange data and files within a group, users can use a shared directory directory /zdisk/<groupname> that exists on our HPC clusters.
Access instructions
Use of VPN
Only direct connections that originate from the internal campus network are allowed at this time. Users who connect from outside of campus must use VPN (Virtual Private Network) to access NU HPC facilities. This requires downloading and installing GlobalProtect VPN software. Please go to NU IT Helpdesk and type VPN in the search box. There should be a form that requests VPN access by NU employees and RAs (an approval by the PI may be required). Read the corresponding instructions, which are also available there. Please keep in mind that NU VPN policies may change with time. Also note that NU HPC team does not manage VPN access of the employees and is not responsible for its operation. For any issues and inquiries regarding VPN please contact NU Help Desk directly by submitting a ticket through the ticketing system. Please remember that the VPN access is necessary only if you are outside of the NU campus network. If you connect from campus you do not need to use any VPN software (in fact, you will not be able to establish a VPN connection then).
Note that using GlobalProtect corporate VPN is somewhat different from using consumer VPN services such as NordVPN, Surfshark, ExpressVPN, etc. While the latter ones typically route all your network connections through one of their servers, which may result in significantly reduced data transmission speeds, running GlobalProtect VPN on your computer or device does not affect any of your connections with hosts located outside of NU (e.g. Youtube in a web browser). GlobalProtect VPN just enables secure connections with hosts that are located on NU local network, as if you were sitting on NU campus. Thus, running GlobalProtect VPN in background should not affect your common internet activities, such as reading news, listening podcasts, or watching videos. Neither it should affect your SSH connections with external hosts that do not belong to NU network. Therefore you can leave GlobalProtect VPN on at all times on your computer.
Hosts
When a user is on the campus network or connected to it via VPN, he/she should use the SSH protocol (with the default port 22) to establish a connection with the interactive login/management node of the system they intend to use. The IP addresses of the login nodes are as follows:
| System | Numeric IP address | Host name |
|---|---|---|
| Shabyt cluster | 10.3.64.61 | shabyt |
| Muon cluster | 10.3.64.46 | muon |
Two-factor authentication
Access to NU HPC systems requires two-factor authentication, i.e. you will be prompted your password (first factor) and a six-digit PIN code (second factor). Before you login for the first time, you will need to add a token to your mobile phone. Each new user receives a username, password, and QR code through email by the NU HPC admin. Please follow the following steps:
- Open the App Store on your iOS device or Google Play Store on your Android device.
- Search for and install the Google Authenticator (App Store) or Google Authenticator (Google Play Store)
- Once installed, open the app and follow the on-screen instructions to set it up.
- After setup is complete, you will be able to use the Google Authenticator app to generate a verification code when prompted during the login process. Please scan the QR code that is sent to you.
SSH client software
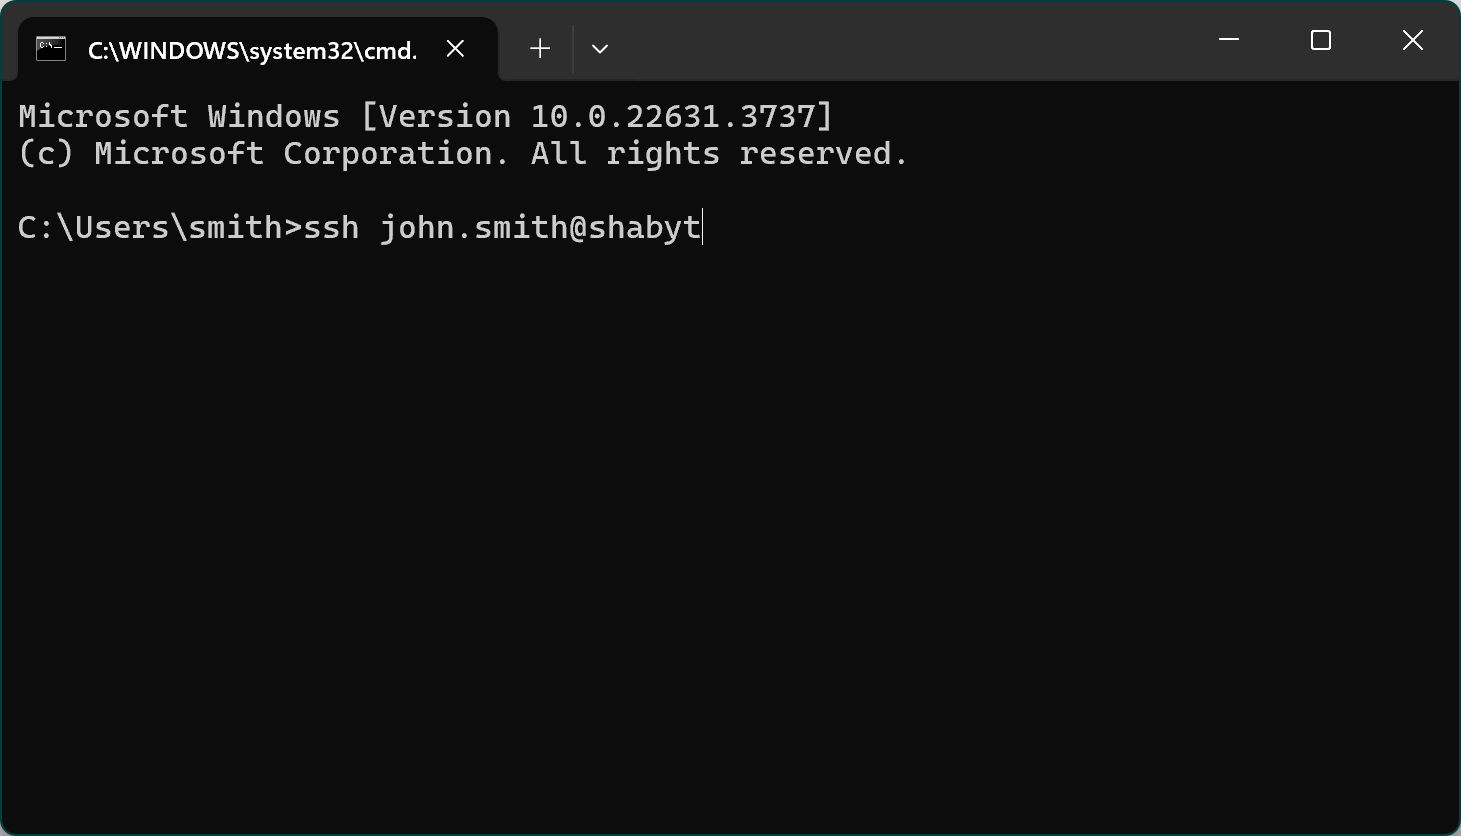
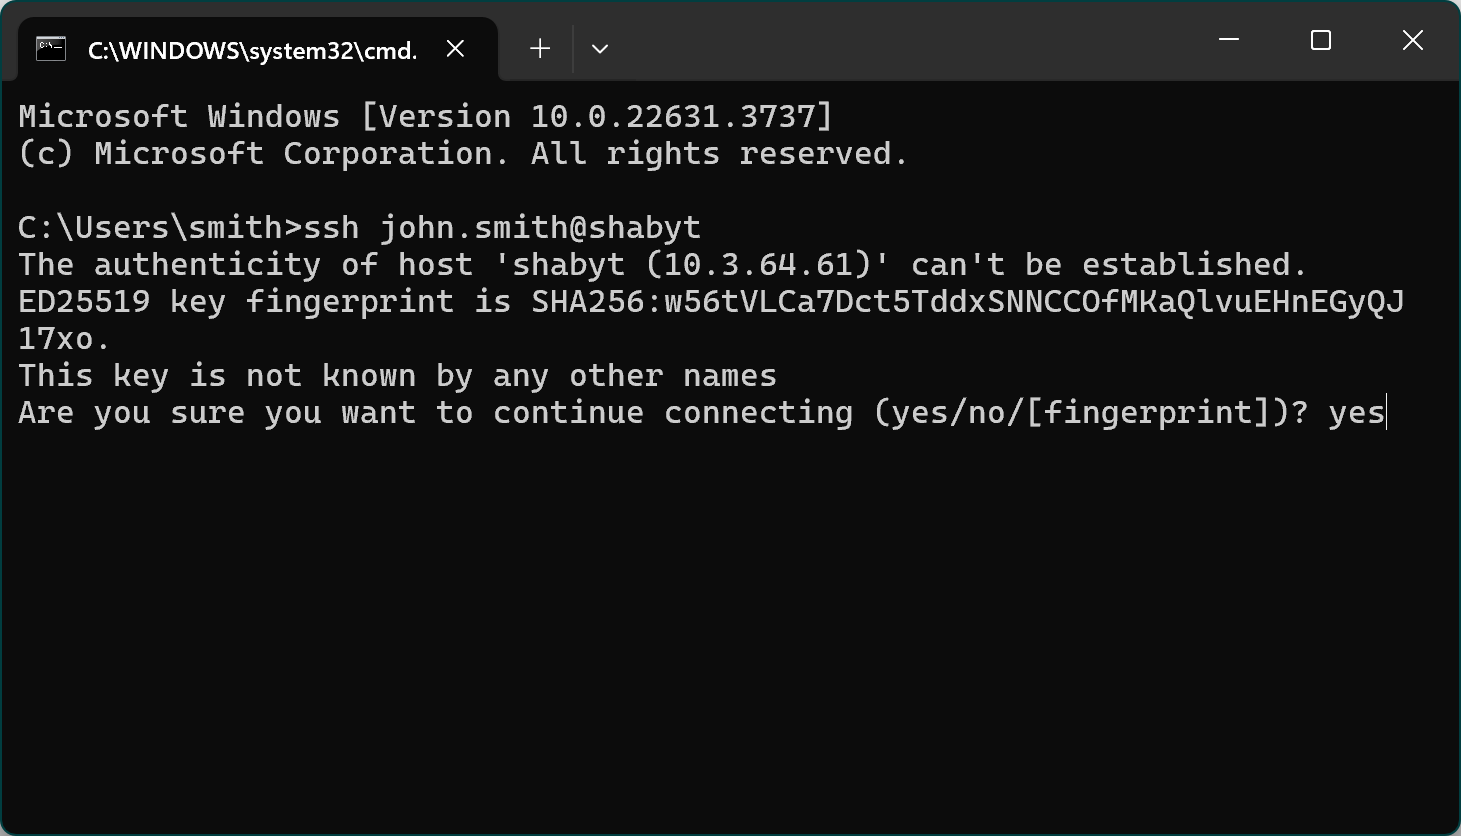
There is a multitude of free and powerful third-party SSH clients available for any operating system. Moreover, Windows, Linux, and MacOS all have native SSH clients built directly into the command line. For example, in Windows, one can just launch the command prompt (press Windows+R keys, type cmd.exe, and hit enter) and initiate an SSH session from there by typing ssh yourusername@shabyt or ssh yourusername@10.3.64.61. You will be prompted to confirm the authenticity of the host (only when you connect for the first time) by typing yes, and then enter your first factor (password) and second factor (6-digit PIN shown in Google Authenticator app on your phone)
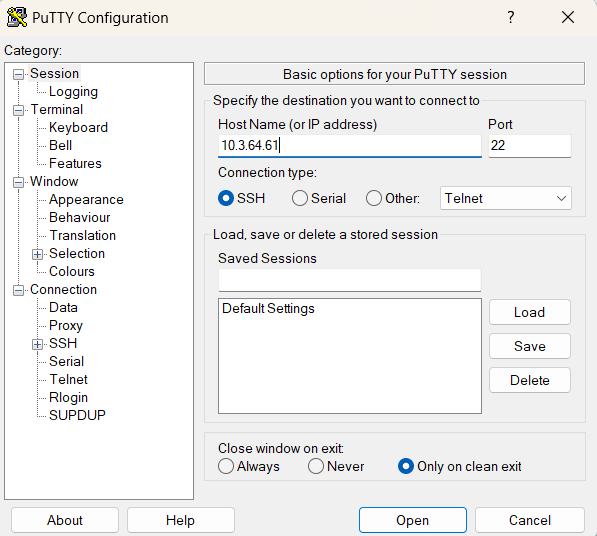
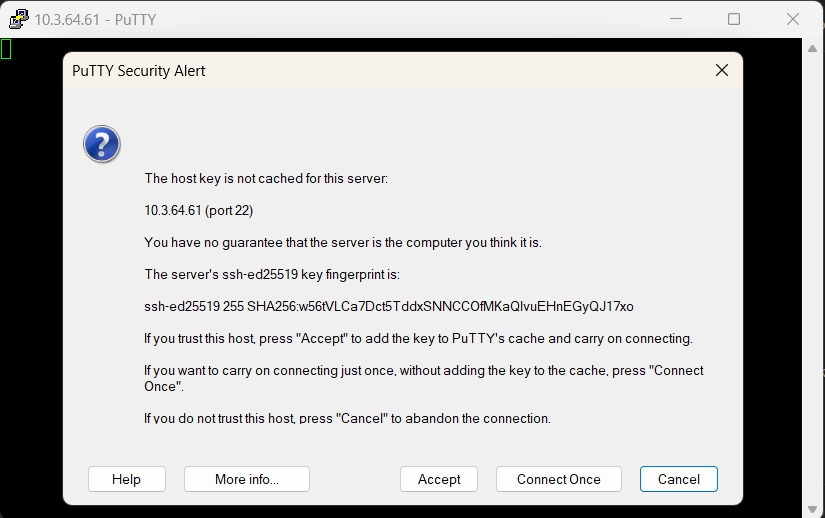
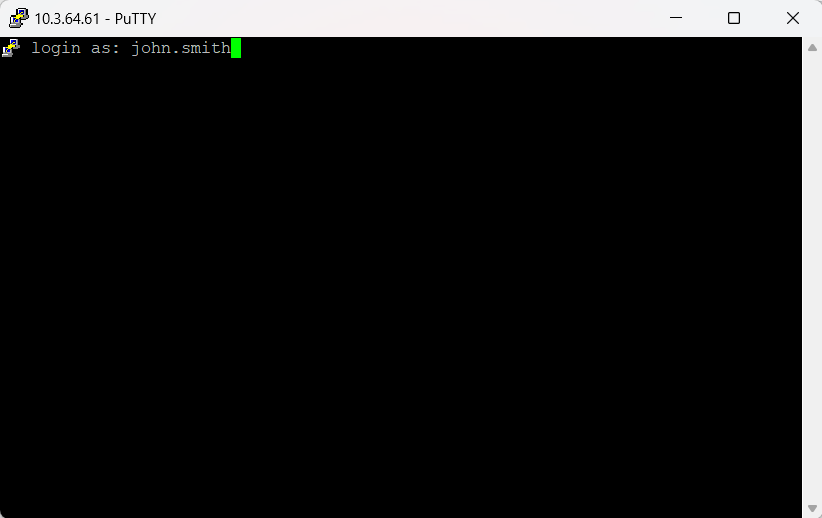
If you wish to use a SSH client with a graphical user interface on Windows, we can recommend PuTTY. Here is an illustration how you can connect with PuTTY:
- In the PuTTY configuration window, enter 10.3.64.61 (the IP address of the Shabyt login node) in field "Host Name"
- Choose the field "Connection type" choose SSH
- Press the "Open" button
- When connecting for the first time, PuTTY will show a security alert. Accept it by pressing the "Accept" button
- Next a terminal will prompt you to enter your username. After your entering your username press enter
- You will be prompted to enter your first factor (password) and second factor (6-digit PIN shown in Google Authenticator app on your phone)
Transferring files
You can transfer files between your personal computer and HPC clusters using the scp command in the terminal. This command operates similar to the standard Unix cp command, but it allows you to specify a remote address/location in place of the source or destination file. For example, if you wish to copy a file called myfile.dat located in directory /my/local/path/ on your computer to a directory called my/remote/path/ that is located inside your home directory on Shabyt cluster you can type the following command in the terminal:
scp /my/local/path/myfile.dat john.smith@shabyt:~/my/remote/path/
where john.smith is your Shabyt username and the tilde sign ~ is a short substitute for your remote home directory path (in the case of Shabyt the tilde is equivalent to /shared/home/john.smith so that the full path is read as /shared/home/john.smith/my/remote/path).
As an alternative to scp, you can invoke the sftp command line utility (similar to the standard and unencrypted ftp) that uses Secure File Transfer Protocol (SFTP) for remote file operations.
If you prefer a graphical user interface for file transfer, there is a multitude of free and commercial SFTP or SCP clients. One of the most popular clients with graphical interface that supports the SFTP protocol and is available for all major operating systems is FileZilla. If you use Microsoft Windows you may also consider WinSCP.
